Described below is the planning of and setup of a DISE Server base system.
In a DISE Cloud setup, the installation of DISE Server is done first - once this has been completed, players can be setup.
Requirements
- A physical or virtual server meeting the system requirements.
- Access:
- DISE Server binds to port 80 (HTTP) for players as well as web users. The port needs to be opened in the firewall(s). If other existing web server software already uses port 80, this software needs to be disabled or the port be changed.
- Web sockets are used for network-wide broadcasts. Web socket traffic is tunnelled through port 80, so no special ports need to be opened.
- The server IP should be statically assigned.
- If players are to access the server over the Internet, the server has to have a public IP, and the proper configuration made in regards to SAT / NAT / Port forwards.
- For security reasons we recommend the (static) IP is used in favor of DNS hostname.
- The network link between players and Server should be responsive and fast. We recommend at least 10 Mbit/s.
Installation
 Note: If you are interested in trying out DISE Server live first before installing it on your end, please contact support.
- Download the installer package.
- Run the installer as an administrator.
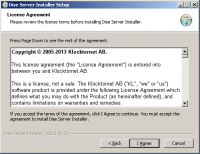
- Proceed by accepting the license agreement.
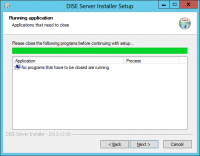
- The installer searches for applications that need to close before proceeding. Click Close all to instantly close them.
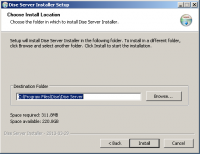
- Enter a directory where to put files uploaded by users. The installer will by default select the largest drive in the system. The default will be a folder called "DISE Server data".

- Enter the directory to put the DISE Server application files. The default will be in the system drive - "C:\Program Files (x86)\DISE\DISE Server".
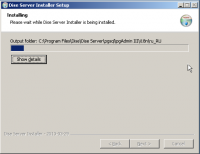
- The installation of files is in progress.
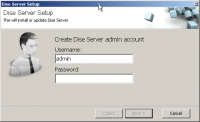
- After installation is completed, a separate dialog is opened where further configuration is made.
- Here, enter an admin password (the first multinetwork admin in the system).
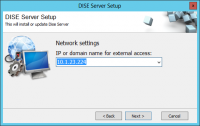
- Enter the public IP or hostname that players and users will access the server through. The server needs to have a public IP and properly configured firewall to allow access if players are to reach it over the internet.
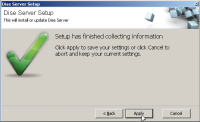
- Click Apply to start the configuration.
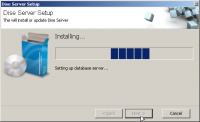
- Setting up the internal workings of the server. It will also setup a web server which by default listens on port 80.
- Leaving the checkbox ticked and clicking Finish will open up a web browser and point it to DISE Server web user interface.
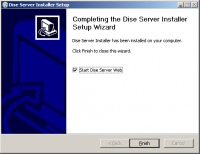
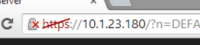
- If you want to be able to access the server over the internet, please now attempt to access it by typing in its public IP, prepended by http://. You should see the DISE Server login screen.
Network Address Translation / port forwarding
The appropriate NAT or forward rules need to be setup when the server is behind a public router. Please check your router documentation for information.
In addition the public address and port needs to be known to DISE Server itself to propagate this setting to players. Settings for this is done in DISE Server's administration interface.
 Read more: Network address translation - wikipedia.org
Post-install recommendations
- As with any web server, securing it against attacks is vital.
- Keep the OS up-to-date.
- Please make sure to select a secure password for the admin user. This user should only be used in critical situations - make sure to create a new user as soon as possible.
HTTPS
Access to your server is available through https. A self-signed certificate (by DISE) is installed with DISE Server.
Note: This will cause web browsers to warn about an untrusted connection when you access your server, since the certificate is valid for a default host (diseserver.net).
If you wish to secure your site with your credentials, you need to retrieve a certificate for your host (not provided by DISE) and install the certificate on the server. Please contact your host provider or contact support for further assistance.
Go to the DISE Control panel
- Using a web browser, enter the adress to the server.
- For example, "http://localhost".
- In the landing page, click the "DISE Server Control Panel" link to setup customers' networks, or access it directly through "http://<server-ip-or-hostname>/?ds=controlpanel"
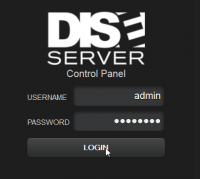
- Here enter admin as user and the same password you have specified during the installation process.
- Go to the Licensing tab and find the following information:
- "Server license tag", "Hostname"
- This information is what you need to send to DISE International AB in order to get a server license file.
- Once you have retrieved a license file (.lic), please return to this page, click Upload license file and browse to the .lic file.
Note: License files are tied to a specific server and can never be misused on a different one.
Read more: DISE Server, Getting started
Troubleshooting
If you have another web server set up previously, you will need to change the listen port setting for either that web server or DISE Server's internal web server (nginx) in order for both to co-exist peacefully.
To edit the listen port settings, open the file "<DISE Server data folder>\nginx\conf\nginx.conf".
Read more: DISE settings files
Read more: Configuration - Nginx Community


