- Make sure that both the manager and player PCs are started and logged in.
Manager
DISE Composer

- You are presented with a welcome screen that lets you choose a basic task.
- Click the New button.
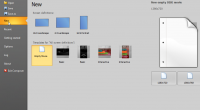
- This dialog lets you choose a resolution for your DISE Movie.
- If you know what resolution you have on your player, you will get the best result if you create your DISE Movie in the same resolution.
- You now have an empty DISE Movie.
- The chequered area in the middle is called the edit area.
- Select the File Browser tab to the left and browse to an image that you want to show.
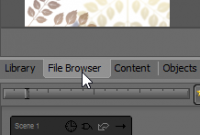
- Drag-and-drop the image onto the edit area.
- Right-click the image and select Use object as background.
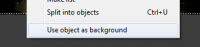
- The image will fill the background.
- Select the Text Object
 on the Objects tab and drag on top of the edit area.

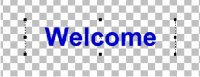
- In the Text tab that opens, write something, select a font and a size.

- You now have a text object on the scene.
- To open the Text Object dialog again, right-click the text and select Edit
- Select the text object and drag to move it.
- Click the Save button
 in the toolbar to save your DISE Movie.
- To preview the movie you are editing, just press the Play all scenes
 button above the edit area.
If you want to he change if the preview should be shown in a window or in fullscreen, select Tools > Output Settings from the system menu.
- You have created a complete DISE Movie that can now be published to your players.
- Click the DISE Bridge button
 in the toolbar.
- DISE Bridge is started.
DISE Bridge
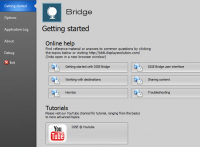
- You are presented with a welcome screen.
- Select the Home tab.
- If you chose to setup a destination using the DISE Setup Wizard, there should already be a destination called Default and you can skip the following 5 steps.
- Click the Add button
 and select Add new destination
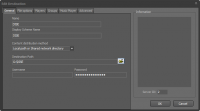
- Enter a name for the destination.
- Under Content distribution method, select if you want to put your content on an FTP server or a shared folder.
 Read more: File server setup
- In the fields below, enter the path and any details to use to log in to the server/share.
- Click Ok. You now have a destination!
- Select the destination to the left.
- To the right is where your playlist of DISE Movies will be displayed. Select the File Browser tab.
- Proceed to browse to your DISE Movie (with file extension .disemovie) and drag-and-drop it in the playlist to the right. You may also drag and drop media files directly such as images and videos.
- To distribute your DISE Movie, click the Send button

Player
Start DISE Probe and DISE Replay.
DISE Probe
- If you chose to setup a destination using the DISE Setup Wizard, there should already be a corresponding download location called Default and you can skip until the last step in this section.
- Select Settings > Preferences. You are presented with the Probe Settings dialog.
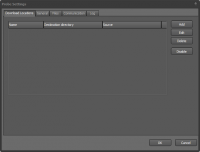
- Click Add. The Edit download location dialog is displayed.
- Enter a name for the download.
- Under Update communication method, select either Networked with shared directories or FTP (depending on the upload method in DISE Bridge).
- If you select to use a network share, either browse or enter the path to the shared folder under Source directory.
- Under Destination directory, browse or type in the path to the local folder to download to, for example, "C:\DISEContent\Destinations\Default".
 Note: It is always recommended to download material to a folder that is local to the player. In addition, the destination folder must not be the same as (or subfolder to) the source folder.
- Click Ok twice to reach the main Probe Window.
- Hit the Start button. Probe will begin downloading your files after a few seconds, and after that, by default, will check for updates every minute.
DISE Replay
To get your playback up and running you essentially need to do two things: select what display scheme to use and adjust the output settings.
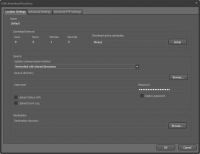
- Select Settings > Preferences from the system menu. The Replay Preferences dialog will be shown.
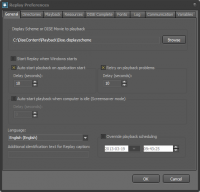
- In the Display Scheme or DISE Movie to playback box at the top click Browse.
- Browse to the where you selected previously as destination directory in DISE Probe, or, if you used the DISE Setup Wizard, go to the "C:\DISEContent\Destinations\Default" directory.
- Select the displayscheme file located in the directory. It was created and uploaded by DISE Bridge and contains all information about the DISE Movies and their scheduling.
- Make sure that Start Replay when Windows starts is checked when you like Replay to autostart.
- If you did the previous step, also check Auto start playback on application start and enter a number of seconds to wait, such as 10, below.
- Click Ok to close the dialog.
- Select Settings > Output Settings from the system menu. The Output Settings dialog will be displayed.
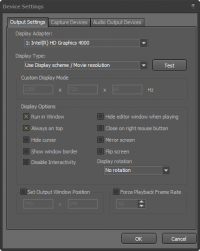
- Under Display Adapter, make sure to choose the graphic card to use (if you have more than one)
- Under Display Type you are given several options to choose what resolution to use. Select Selected display mode and then in the list under Display Mode, select the resolution that best matches your screen and your content.
- Click Ok.
- Click the Play button and you're up and running with your DISE Pro system!
See also


