 Note: This page is about setting up Windows players (DISE Premium) for DISE Cloud. See DISE Pro for more information on setting up a player for that system.
Use a preconfigured player image
Certified hardware
DISE's goal is that you should be able to acquire hardware from a few of our selected hardware manufacturers, that will be preconfigured for Digital Signage and already preinstalled with DISE. The entire concept will fit mostly for the "average" or "general" signage installations - the ones with up to like 10 players, located maybe in a store, or restaurant, or office. Larger installations, like airports and metros and similar, which may require hundreds of players, will always require specific settings and processes, so this concept may not be ideal for those installations.
Windows settings
DISE maintains a number of images with a Windows installation where we have modified a few settings and deactivated things not needed in a signage player. Among other things:
- Deactivated UAC (User Account Control)
- Deactivated security and maintenance messages that could pop up interrupting the playback
- Disabled visual features that could drag down the performance
- Optimized the virtual memory size
- Deactivated automatic updates from Microsoft
- Disabled Windows services that we do not need
- Optimized the power options
- Deactivated the screen saver
 Read more: Windows settings
The only thing installed is DISE and the necessary codecs for playback of video.
Setup process
When using one of these images, DISE Control Center will start up automatically on startup. The technician can be guided through a number of steps that help with registering into DISE Server. This setup process will require a minimum amount of work from the technician.
- DISE Control Center starts up.
- A welcome screen is presented.
- The technician enters the DISE Server hostname (for example, diseserver.net), the network to use (DEFAULT if no network is specified), and an admin user and password.
- Control Center connects to DISE Server. If it cannot connect because there is no network connection or the credentials are wrong, the technician will be notified.
- Control Center registers the hardware into DISE Server and creates a player. The player name will be retrieved from the registry key "HKEY_CURRENT_USER\SOFTWARE\DISE\ServerCom\Vendor". If there is already a player by the same name, a number will be added to the end (NAME2, etc). If no registry key is found, the player MAC address will be used. This name will be presented onscreen, so that it can be found on the server.
- Control Center will start the playback and play a default playlist showing a tutorial. The tutorial will describe the steps to take on the Server to get content to this player.
Manually setting up players
Set up remote access
We strongly recommend you to install software to allow for remote access and administration on players, in case some problem occurs (you can control only the DISE parts from Server). This is especially true if the players are located in hard-to-get-to places.
Windows settings
Read more: Windows settings
Install DISE
Players may be installed using installation packages which are generated by Server. These packages contain all information needed to connect to Server. The installation package also will install common codecs for playback of video.
Using a player-specific installer
Create the player in Server's web interface from the PC itself, or do the below steps on another PC first, and then run the installation package on the player PC.
- Log on to Server.
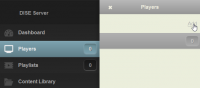
- Click the Players tab to the left.
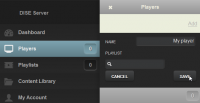
- Click Add near the top of the Players section. Doing so will let you type in a name.
- Click Save to create the player.
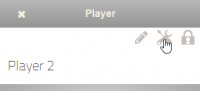
- Click the arrow next to the name to open up the player.
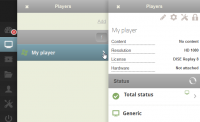
Note: The Hardware field in the newly created player says "Not attached", meaning it is not yet installed on a PC.
- Run the installer on the PC.
- The installer will come pre-configured with the settings to connect to Server.
- By default, the PC will reboot after the installation is complete.
- On startup, DISE Control Center will automatically start and begin communicating with Server.

- Control Center will start the playback.
Use a generic installer
- Log on to Server.
- Go to the System > Downloads section.
- If you don't have the System tab, you are not an admin of the system, and so can't download generic installers.
- Click to download the appropriate installer.
- There are two generic installers:
- Will ask the user for a name and description to use for the hardware.
- Will not ask any questions. The computer name will be used as the hardware name.
- Run the installer on a PC.
- This will register the PC into Server but will NOT automatically create a player.
- The installer will come pre-configured with the settings to connect to Server.
- By default, the PC will reboot after the installation is complete.
- On startup, DISE Control Center will automatically start and begin communicating with Server.
- Control Center will start the playback.
- Since there is currently no player attached to the PC (and thus no playlist), a default content will be shown.
Content download location
During installation DISE will try to determine the best drive to store content (media files etc.) on.
It will prioritize disks as follows:
- Fixed disk (a hard disk/flash drive) without an active write filter (EWF; Enhanced Write Filter - wikipedia.org). If more than one such disk exists, the largest one will be used.
- Removable disk (a thumb drive or flash card reader) without an active write filter. If more than one such disk exists, the largest one will be used.
- The system drive regardless of write filter.
Content will be downloaded first to %TEMP% and then moved to this folder. The path to the content download is possible to override at a later time by setting the "ContentCachePath" custom setting for the player.


