To get your playback up and running you essentially need to do two things: select what display scheme to use and adjust the output settings.
Select the display scheme
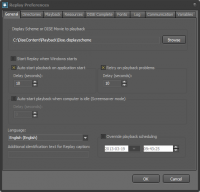
- Select Settings > Preferences from the system menu. The Replay Preferences dialog will be shown.

- In the Display Scheme or DISE Movie to playback box at the top click Browse and find the directory where the content is stored for this Player. If you used the DISE Setup Wizard the default is "C:\DISEContent\Destinations\Default".
- Select the display scheme file with the name "Example.displayscheme". This file was created in DISE Bridge and contains our complete channel, DISE Movie and schedule configuration.
- Check Start Replay when Windows starts if you like Replay to autostart.
- If you did the previous step, also check Auto start playback on application start and enter a number of seconds to wait, such as 10, below.
- Click OK to close the dialog.
Adjust the output
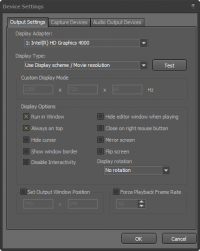
- Select Settings > Output Settings from the system menu. The Output Settings dialog will be displayed.

- Under Display Adapter, make sure to choose the graphic card to use (if you have more than one)
- Under Display Type you are given several options to choose what resolution to use. Select Selected display mode and then in the list under Display Mode, select the resolution that best matches your screen and your content.
- Click OK.
Play
Click the Play button and you're up and running!