Overview
The Video object allows you to add video files to your DISE Movie. It is found in the Objects tab of the main Composer window.
Creating a video object
In the Objects tab, double-click on the video icon or click it and draw where you want it on the edit area. This will bring up the Video properties.

You can also drag-and-drop from the file browser into the edit area. This will insert the video without showing the Video Preferences window.
Properties
General tab

Video source
- Can come from a local file, or a URL.
Preview
- Shows a preview of the video
Control buttons
- Normal video playback controls for the preview
Start / stop position
- Allow you to start or stop some time into the video.
- When a video is loaded, its length will be represented by a blue color filling the horizontal field. To cut a video, move the handle (or enter it in the numeric field) to where you want to insert a start or stop position, then click the appropriate Set button.
Options tab
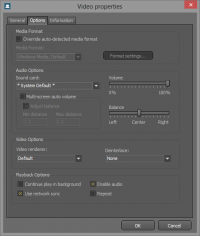
Media format
- Settings for what media format will be selected and special options for that format. Normally the format is auto-detected but in special cases it might be desirable to override the format. In that case check the Override auto-detected media format check-box and select the desired format from the drop-down Media Format box. If the selected format have special options available the Format settings... button will be enabled.
- For example, if you use QuickTime the format options allows you to enable the use of transparency (video with an alpha channel) and video buffering.
- You can also if you want force a certain codec, such as Haali + FFDshow - DISE will then explicitly use the desired codec to render the video, of course assuming that the codec/splitter is installed.
 Read more: Codecs
Audio options
- In audio options you can select what sound card you want to output the audio on and what output volume and panning you want. The various audio outputs are setup in the Audio Output Devices.
- To enable or disable audio use the checkbox in the Playback Options section.
- Under Audio options you can also enable the special Multi-screen auto volume mode. This mode enables automatic change of volume depending on how far away the object is in relation to the output screen. If you tick the Adjust balance checkbox, the audio will also be panned (left/right) depending on the horizontal position. Min and max distance lets you alter the range of where the volume will be silent to where it will be in full strength.
Video options
- In video options you can select a different video renderer and enable de-interlace of interlaced video material. Normally you should use the Default renderer.
Playback options
- Continue play in background
- Enables videos to play after the video object has ended. The audio will be muted but the video is not stopped.
- Enable audio
- Enables audio on the video object. This is normally on.
- Use network sync
- Normally on, but un-checking this disables the use of a synchronized network media clock.
- Repeat
- Loops the video endlessly
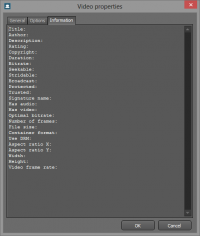
Information tab
If more information about the video file is available, this tab will show that information. This can be metadata embedded in the file or information about resolutions and frame rates.
Video formats
DISE can playback many different video formats, since DISE uses DirectX and DirectShow for video playback you can test if a video format can be played by trying it out in Windows Media Player.
Most common formats will play without any modifications or installations, but if a video format does not play or if there is no sound then you probably has to install a codec that supports this certain video and/or audio format.
Read more: Supported formats


