On starting DISE Bridge, you are presented with a welcome screen that lets you find help on frequent tasks.
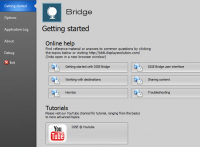
- Opens a web browser and points it to our knowledgebase.
- Opens a web browser and points it to our YouTube channel.
You also have the option of not showing the welcome screen on future startups.
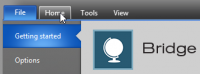
Click the Home tab to get going.
Basically, what we need to do is the following:
- Define a destination.
- Add DISE Movies or media files to the destination.
- Send it out.
Define a destination
If you previously specified what server to put your content on during setup using the DISE Setup Wizard, there will be an item to the left saying "Default". This is called a destination and holds all the information about where to send your content.
If, on the other hand, you didn't specify this during setup,
- Click on the
 button in the ribbon, and select Add new destination.
- The Edit Destination dialog is displayed.
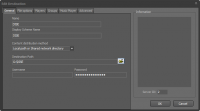
- In the name field, enter the destination's name.
- Consider a logical, descriptive name, for example, store name (MyStore South, MyStore North), chain name (MyStore) or location name (Counter, Deli).
- Under Content distribution method, select whether you want to send your content to a local or network share, or to an FTP server.
- Enter the details for the server below.
- If you are required to login remember to enter the credentials.
- Click Ok to create the destination.
Add DISE Movies
- Select the destination you have just created.
- Click the File Browser tab.
- Browse to your recently created DISE Movie, and drag it onto the area to the right, under where it says "<your-destination-name>, Channel Main".
- The DISE Movie is now in your playlist and will be looped indefinitely.
Add images and video directly
- Select the destination you have just created.
- Click the File Browser tab.
- Browse to a media file such as an image or video and drop it under where it says "<your-destination-name>, Channel Main".
- The image or video is now in your playlist. By default it will stretch to fill the screen.
- You may use the Duration field in the ribbon to set for how long an image should be visible. Any video added in this way will automatically be displayed its detected duration.
Send it out
- Right click your destination and select Send or click the
 (Send) button in the ribbon.
- The DISE Movie, along with all necessary files will now be transferred to the server you have chosen!


